Big Picture:
- VS Code: A code editor with many features and extensions.
- GitHub: A platform for version control and collaboration.
- Git: A version control system for tracking changes in your code.
- Live Share: A feature in VS Code for real-time collaboration.
VS Code
Similar to Microsoft Word for code.
GitHub

Similar to Google Drive for code.
Live Share
Similar to Google Docs for code.
This cheatsheet heavily references Introduction to Git for VS Code. Check it out for more details!
VS Code:
What is VS Code?
- Visual Studio Code (VS Code) is a free, open-source code editor.
- It is highly customizable and has many extensions for different languages and tools.
Set Up:
- Install VS Code: Download and install Visual Studio Code from code.visualstudio.com.
- Extensions: Add extensions for Python, Git, and other tools.
- You can find extensions in the sidebar of VS Code.
- Some popular extensions include Python, GitLens, and Live Share.
Useful Extensions:
- Python: For Python development.
- GitLens: For Git integration.
- Live Share: For real-time collaboration.
- Jupyter: For Jupyter notebooks.
- Pylance: For Python language support.
- Bracket Pair Colorizer: For matching brackets.
- Code Runner: For running code snippets.
GitHub Basics:
What is GitHub?
- GitHub is a platform for version control and collaboration.
- It allows you to store your code in repositories, track changes, and work with others.
Set Up:
- Create an Account: Sign up for a free account on GitHub.
- You already have an account if you used GitHub for CS50.
- Install Git: Download and install Git on your computer from git-scm.com.
- Set Up Git: Configure Git with your name and email address.
- Open a new terminal and run the following commands:
git config --global user.name "Your Name"(this can be your GitHub username)git config --global user.email "youremail@mail.com"(this should be your GitHub email)
- You can check your settings with
git config --list.
- Open a new terminal and run the following commands:
- Install VS Code: Download and install Visual Studio Code from code.visualstudio.com.
- Install GitHub Desktop: Download and install GitHub Desktop from desktop.github.com.
- This is an optional tool for managing your repositories.
- Extensions: Install the GitLens extension in VS Code for better Git integration.
- Extensions are found in the sidebar of VS Code.
Key Concepts:
- Repository (Repo): A project folder that contains your code and files.
- Branch: A parallel version of your code that you can work on independently.
- Commit: A snapshot of your code at a specific point in time.
- Pull Request (PR): A request to merge changes from one branch to another.
- Merge: Combining changes from one branch into another.
- Fork: A copy of a repository that you can work on independently.
- Clone: Downloading a copy of a repository to your local machine.
Commands:
git clone <repo-url>: Clone a repository to your local machine.git add <file>: Add changes to the staging area.git commit -m "message": Commit changes with a message.git push origin <branch>: Push changes to a remote repository.git pull origin <branch>: Pull changes from a remote repository.git checkout -b <branch>: Create and switch to a new branch.git checkout <branch>: Switch to an existing branch.git merge <branch>: Merge changes from one branch into another.git pull-request: Create a pull request on GitHub.
Pull vs. Push vs. Fetch:
- Pull: Get changes from a remote repository to your local repository.
- Push: Send changes from your local repository to a remote repository.
- Fetch: Get changes from a remote repository to your local repository without merging.
GitHub Workflow:
When you want to create a new repo / project in VS Code:
- Create a folder locally on your computer for your project.
- Open the folder in VS Code.
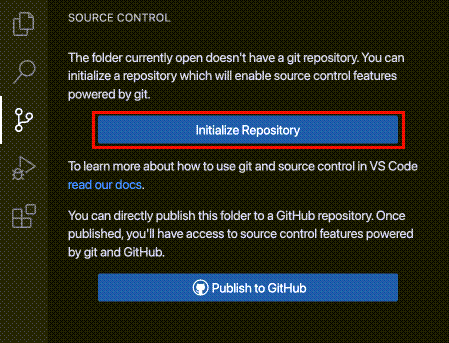
- Initialize a new Git repository in the folder:
git initor, in Source Control (sidebar) in VS Code, click “Initialize Repository”.
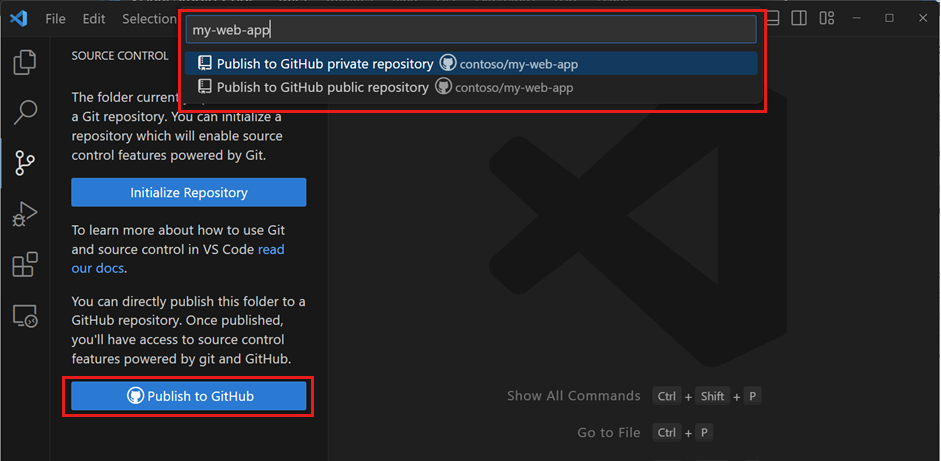
- Create a new repository on your GitHub account.
- You can also do this in VS Code when it prompts you to publish your project.
- You can also create a repository on GitHub and then clone it to your local machine.
- It can private or public.

- If you created the repo on GitHub, copy the URL of the repo. Then, add the remote repository to your local repository:
git remote add origin <repo-url>. - Add your files to the staging area:
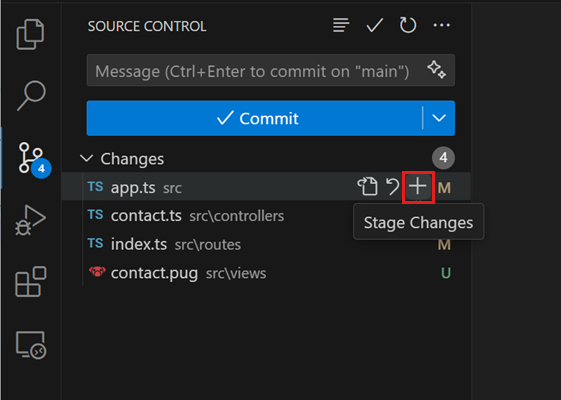
git add ..
- Commit your changes:
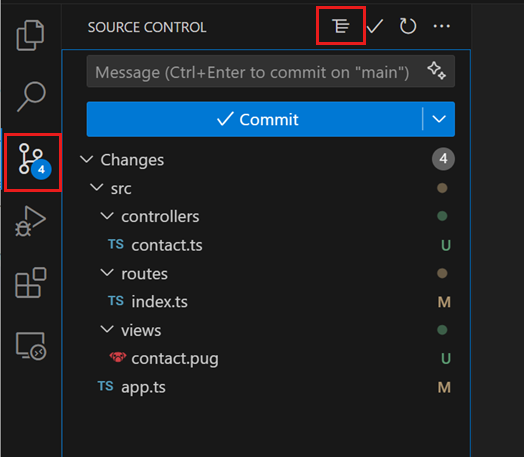
git commit -m "Initial commit"in the terminal or click the checkmark in the Source Control sidebar in VS Code.
- Push your changes to the remote repository:
git push origin mainor click the “Sync Changes” button in VS Code.
When you want to work on an existing repo / project in VS Code:
- Fork: Create a copy of a repository on your GitHub account.
- Only necessary if you want to contribute to someone else’s project.
- Clone: Download the forked repository to your local machine.
- Use the
git clone <repo-url>command, or in VS Code, click “Clone Repository” in the “Source Control” sidebar.
- Use the
- Branch: Create a new branch to work on a feature or fix.
- Technically, you can work on the main branch, but it’s better practice to work on a separate branch for each major feature.
- Commit: Make changes and commit them to your branch.
- Use
git add .to add changes to the staging area.
- Use
git commit -m "message"to commit changes.
- Use
- Pull Request: Create a PR to merge changes into the main branch.
- You can do this on GitHub or in VS Code with the “Create Pull Request” button.
- You can also run
git pull-requestin the terminal. - Make sure to add a description of your changes.
- Review: Collaborate with others and make changes if needed.
- You can comment on the PR and make changes based on feedback.
- Merge: Merge changes into the main branch.
- You can do this on GitHub or in VS Code.
- You can also run
git merge <branch>in the terminal. - Make sure to delete the branch after merging if you don’t need it anymore.
Live Share:
What is Live Share?
- Live Share is a feature in VS Code that allows real-time collaboration.
- You can share your code with others and work together on the same project at the same time!
Set Up:
- Install Live Share: Install the Live Share extension in VS Code.
- You can find it in the sidebar of VS Code.
- Start a Session: Click on the Live Share button in the bottom toolbar.
- You will get a link to share with others.
- You will get a link to share with others.
- Join a Session: Click on a Live Share link to join a session.
- You can edit and run code in real-time with others.
- Collaborate: Work together on the same project and see changes instantly.
- You can chat, share terminals, and debug together.
- To share terminals, click on the “Share Terminal” button in the terminal window and give “Read/Write” access.